Removing watermarks from PDFs with pdftk!
The issue at hand
Many PDFs that I download have watermarks on them. The watermarks being there isn’t always bothersome, but many of them either obstruct important text or they end up making me use more ink when I print. So, through my tinkering, I found a way to remove watermarks from PDFs and I’m going to tell you how.
What you’ll need
You will need some kind of way to run PDFtk Server (https://www.pdflabs.com/tools/pdftk-server/). For me, it’s easy to do, as I run Linux Mint, a derivation of Ubuntu Linux. In any Debian-based Linux distribution, you can install it by typing
sudo apt install pdftk
and that should get it installed.
For Windows, download the installer from HERE, install it, and then run it from the CMD.exe prompt as pdftk.
For Mac, download the installer from HERE and after installing, run it from the command prompt as pdftk.
Now that it’s installed, let me tell you what you need to do.
Preparation
Take the PDF file in question and make a copy of it. I cannot stress this enough. If you don’t copy it, you risk damaging the original file. So, make a new folder/directory and put the copy in that. You’ll thank me later.
I’m using a PDF that I downloaded from Google Books, so I can get rid of the annoying Google watermark at the bottom of every page.
Step 1: Uncompress the PDF
In order for us to find the watermark, we need to first uncompress the PDF. Uncompressing actually allows us to view the inner code of the PDF in a regular text editor, like Notepad or VIM. Without uncompressing it, you’ll mostly see a bunch of encrypted code and we won’t be able to locate the watermark’s pattern.
Uncompressing is a simple task in pdftk, all you have to do is open a terminal in the directory of the PDF you want to edit (I want to stress again that you should have copied the PDF in a separate directory away from other PDFs) and run this command:
pdftk INPUT-PDF-NAME output OUTPUT-PDF-NAME uncompress
Where my template says INPUT-PDF-NAME, be sure to put the precise name of your PDF file. For OUTPUT-PDF-NAME, put the name of what the new and uncompressed file should be, including the .pdf extension. My command looks like this:
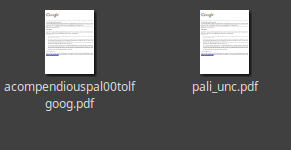
pdftk acompendiouspal00tolfgoog.pdf output pali_unc.pdf uncompress
After typing in the command press [ENTER] and another file should appear next to your original file.
Next, we’ll need to open this file in a text editor that lets us open it.
Step 2: Editing the contents
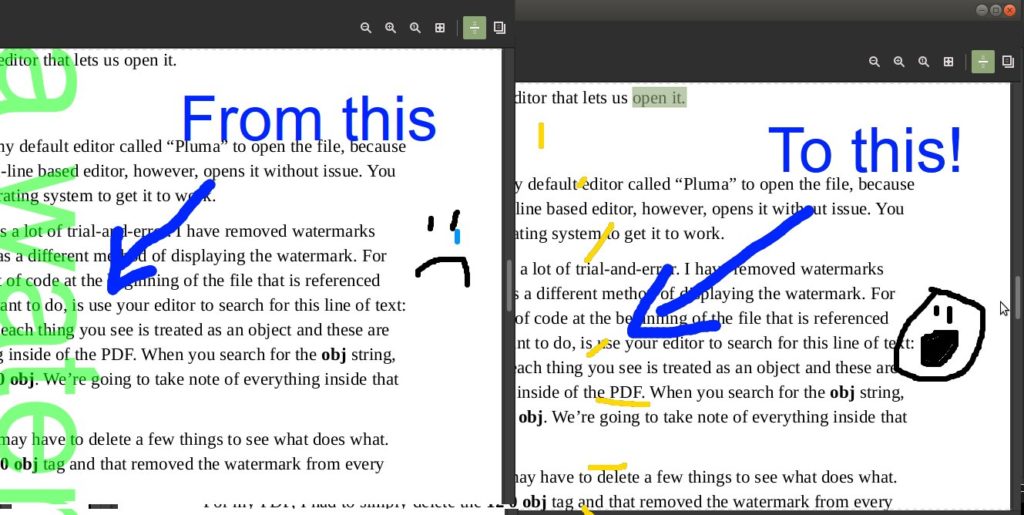
On Linux, I cannot, for some reason, use my default editor called “Pluma” to open the file, because of the way it is encoded. VIM, a command-line based editor, however, opens it without issue. You may have to play around on your own operating system to get it to work.
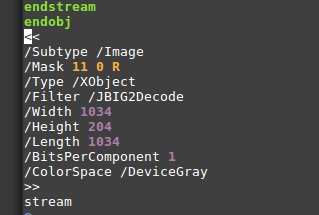
I must preface by saying that this process is a lot of trial-and-error. I have removed watermarks from several PDFs so far, and each PDF has a different method of displaying the watermark. For Google Books PDFs, it seems there is a bit of code at the beginning of the file that is referenced throughout the rest of the file. What you want to do, is use your editor to search for this line of text: obj, which stands for object. In PDF files, each thing you see is treated as an object and these are sequentially-positioned to order everything inside of the PDF. When you search for the obj string, you’ll see a sequence of numbers like: 14 0 obj. We’re going to take note of everything inside that tag and its corresponding endobject tag.
The trial-and-error part comes in that you may have to delete a few things to see what does what. For my PDF, I had to simply delete the 12 0 obj tag and that removed the watermark from every page!
After deleting a line of code, make sure to go to Save As… and save a new PDF file. If you’re lucky like me and get it on the first try, great! But in case you’re not, then you need the original uncompressed PDF as a clean slate, so don’t Ctrl+S when deleting things. I also recommend only deleting one obj tag at a time, so you can better track your progress.
For text watermarks
Watermarks that are generated as text work a little bit differently than image watermarks. Using Step 1 and the first part of Step 2, let’s examine what’s inside of the file. Since I have a short watermark, I need only look for an obj tag that has a very short stream after it. Having located that, I notice that there is a /BBox[ 239 4.6 356 838.7 ] tag inside of the obj. That is giving the coordinates of where the watermark needs to go. I can verify that it is for the watermark, because that BBox tag shows up multiple times in the file with the same dimensions. So, let’s find and replace all of those tags with… nothing! Sure enough, the watermark was gone.
Final words
I want to stress that I do not condone piracy and I do not encourage people removing watermarks to market someone else’s copyrighted PDF as their own. I do this to save on printer ink and eye strain. So, I’ll assume that’s the purpose you all will use it for. Any questions or clarification needed? Leave a comment below!